Old House Restoration

A real family makes an old house their home...for the 2nd time
The Splendido's renovate, restore and rejuvenate their home with their own hands - all while living in the house
and balancing their family needs...you know...like most families have to do it!

Friday, December 26, 2014

Homemade Christmas Gifts are the Best! Gallery Ledge

There is nothing better than homemade Christmas gifts! Especially when they are built by these three little elves!

How to make a gallery ledge - how to build a photo shelf


How to make a gallery ledge - how to build a photo shelfMommy really wanted to add a personal touch to our Breakfast Nook in the form of a Gallery Ledge from My Little Helpers. She got the idea for the shelf from the Book of Hints she gave me for Christmas last year. The Handbook Home by Ana White is a great carpentry book for beginners thru novice. The book's target audience is women, but I love it, too. These ladies are talented and the book is easy to follow. Also most of the projects can be built with only basic woodworking tools. Karen has many of the pages earmarked for the future...as do I. I plan to make the Adirondack Chairs in this book for the Slate Patio this spring.

How to Make a Gallery Ledge

Step 1: Determine the Length you Need

One of the best things about making your own furniture is you can customize it to fit you space. I determined the perfect length for our breakfast nook shelf would be 46.5 inches. Good luck finding a pre-built shelf in that exact length anywhere. 

Step 2: Find your wood

This project can be done with wood you may have left over from a previous project or just laying around in the corner of your basement. The wood can even be beat up and chocked full of imperfections for a nice rustic look (which Karen and I usually go for), but the kids and I decided we wanted this gallery ledge to have perfect squared edges. Plus the kids wanted to "shop for mommy" so off to Lowe's to purchase some hard wood planks. We used 4 inch wide planks for the back and bottom and a 2 inch wide plank for the lip. All planks were 4 foot lengths.

Step 3: Cut to Length

I used my clamps (not pictured) to line up and tighten the 3 sections of wood together and made one cut on my chop saw - this way each of the pieces were perfectly the same length. I did this part - not the kids!!!


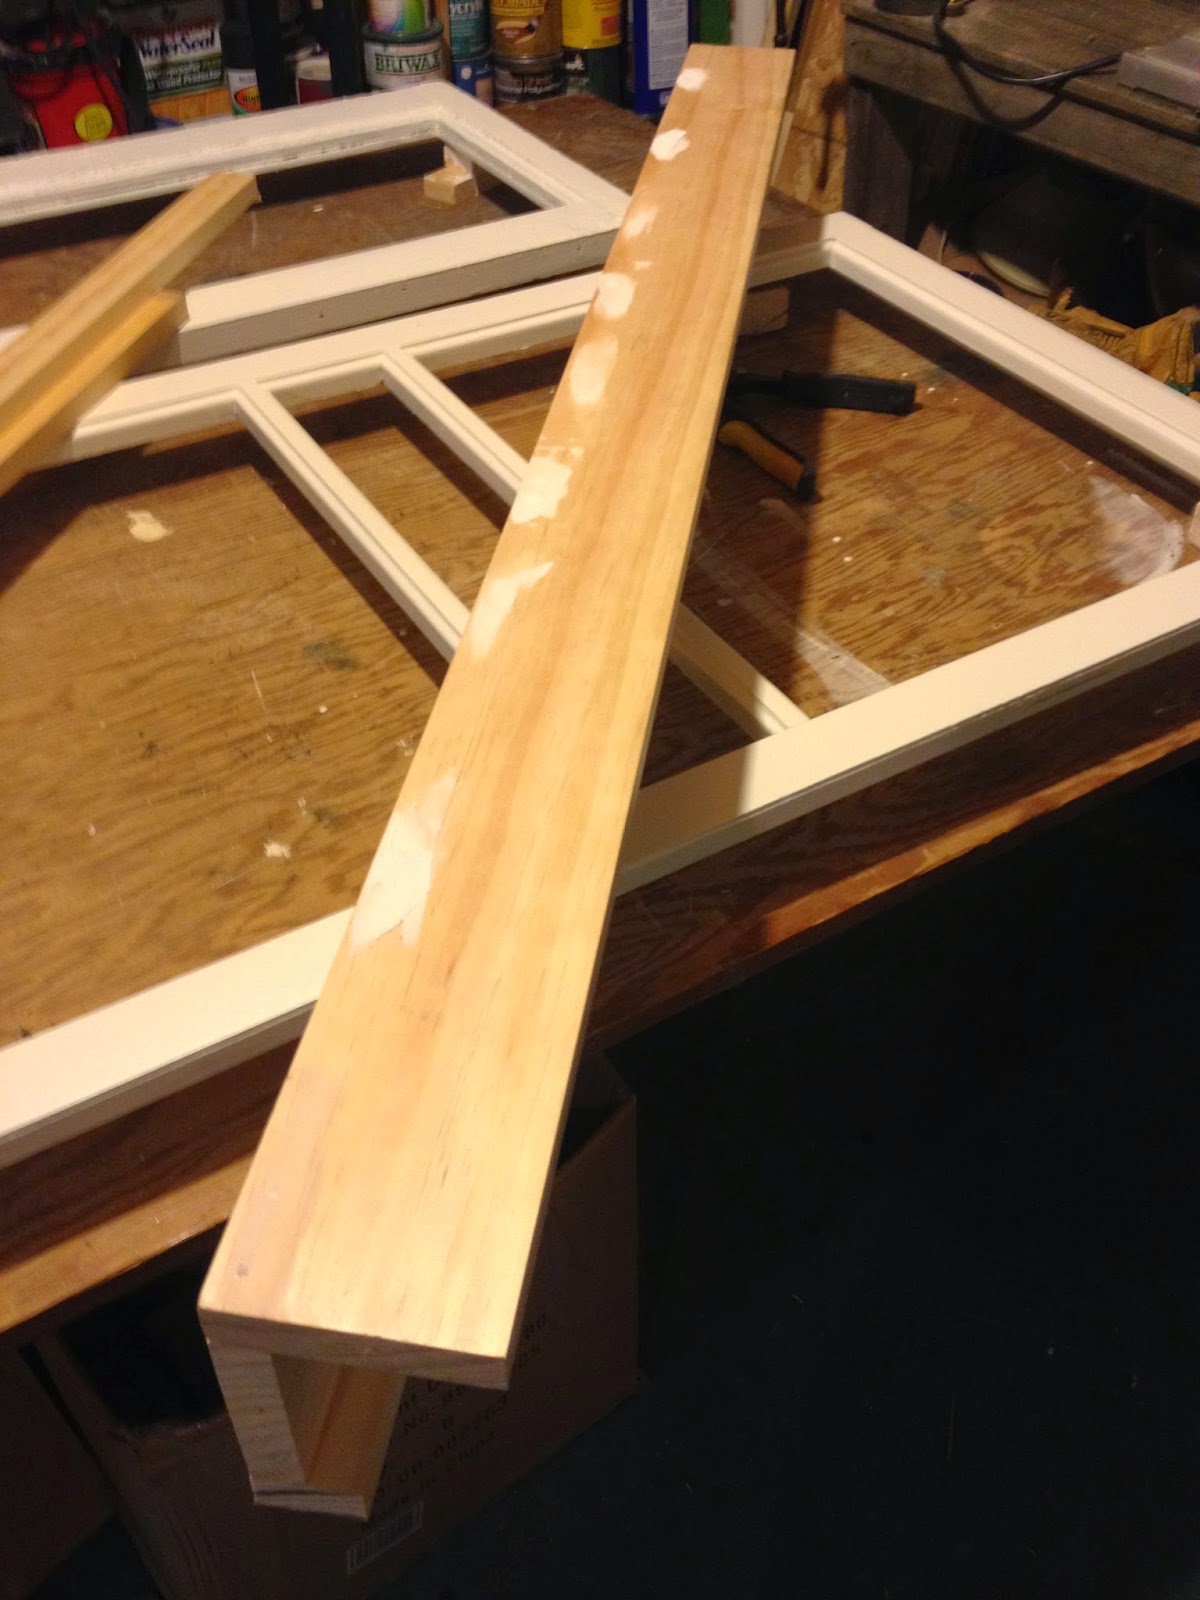
How to make a gallery ledge - how to build a photo shelfStep 4: Assemble the sections of wood - We used wood glue and my finish nailer to attach the back, bottom and lip - being care the seams were tight and square. You could also use a a pocket jig if you have one (I don't - hint) instead.


How to make a gallery ledge - how to build a photo shelfStep 5: Spackle - Fill any imperfection and nail holes with spackle.                           
Step 6: Sand smooth

I used my hand sander and the kids used sandpaper to make sure all surfaces were smooth


How to make a gallery ledge - how to build a photo shelfStep 7: Primer and Paint - We primed and painted the ledge with the same paint I painted the trim work of the Breakfast Nook.

Step 8: Mounting Holes

I should have done this step before I primed and painted, but none-the-less I added three countersunk holes (using two sizes of drill bits since I do not have countersink bits - hint) thru the back of the ledge for mounting on the wall.

Step 9: Wrap for Christmas

Step 10: Mommy LOVES it and kisses everybody

Step 11: Hang on the Wall

With help from Karen, we leveled the shelf and mounted the ledge with wall anchors.

How to make a gallery ledge - how to build a photo shelfStep 11: Add your Artwork - Another of mommy's Christmas presents from the kids were framed pictures. When they were younger we took pictures of each of them wearing chef hats and making homemade pizza for the first time. These were always some of our favorite images and the new breakfast nook gave us the perfect place to display these culinary delights.


How to make a gallery ledge - how to build a photo shelf
Great Pictures!

How to make a gallery ledge - how to build a photo shelf
Side View

How to make a gallery ledge - how to build a photo shelf
Bottom View

How to make a gallery ledge - how to build a photo shelf
Another little family touch are these great Peg People Karen and the kids painted and gave me for Christmas.

 
They even included Carly!...and notice that Luke and I are both wearing our matching Superman shirts - like we do very often!
 
How to make a gallery ledge - how to build a photo shelf - breakfast nook shelf

The homemade ledge, pictures and the peg people are the perfect addition
 to the room we eat most our meals at!

Happy Holidays!

Tuesday, December 23, 2014

Here we go again!...the race before Christmas

Removing Linoleum - Scraping Up Linoleum - Restoring Wood FloorsThe kitchen and breakfast nook shared the exact same floor...which meant both floors were hideous! I finished the breakfast nook floors back in February!...but then turned my attention to the slate patio, so I never got around to the kitchen floor.

Karen has been pining for us to get started on the kitchen for months, but it just never worked out. There were many winter preparation projects and so many fall clean ups...6 fall cleanups - every weekend for 6 weeks! So it is safe to say she was very quick to notice that the snow that hit Niskayuna in early December covered any remaining leaves. I think she said in one breath "Too bad the yard is covered in snow so you can't work in the yard. Let's start the kitchen."

Removing Linoleum - Scraping Up Linoleum - Restoring Wood Floors


So on December 6th I started ripping up the linoleum, felt, plywood and more felt and black tar. 19 days until Christmas...doable...however we were hosting our 1st Christmas with Nanny on December 13th...added little more pressure.

The process was all too familiar for me. This would be my 3rd time dealing with this back breaking task. Once at the old house, then the breakfast nook at this house and now. The only thing - this floor is twice the square footage of those previous projects! However if we wanted the original wide plank pine floors (a Paul Schaefer staple) I knew what I had to do! My only saving grace was I already knew the exact process I had to use. Back in February I wasted a day trying a large assortment of chemicals to remove the black tar - all for naught. Turned out all that was needed was hot water and a 2 inch scraper and a lot of elbow grease.

Removing Linoleum - Scraping Up Linoleum - Restoring Wood Floors - Ripping Up Linoleum

Here you can see a tiny piece of my motivation
A small portion of the re-finished breakfast nook floors


Restoring Your Wood Floors

Step 1 - Remove the Linoleum

Removing Linoleum - Scraping Up Linoleum - Restoring Wood Floors - Ripping Up LinoleumThe linoleum removed pretty easily with a heavy duty floor clean up scraper. I just repeatedly slammed that in between the linoleum and the plywood and peeled up the linoleum. I kept the kids out of the room and work with a mask.


Removing Linoleum - Scraping Up Linoleum - Restoring Wood Floors - Ripping Up Linoleum - Removing Black Tar from Wood Floors
At the end of the first evening (2 hours of work) I covered everything with some drop cloths (old curtains) for the evening - after all I had to go to Craft Night at Hillside Elementary.


The next morning I got to work nice and early. First removing the rest of the linoleum

Removing Linoleum - Scraping Up Linoleum - Restoring Wood Floors - Ripping Up Linoleum - Removing Black Tar from Wood Floors

Step 2 - Remove the Plywood

Removing Linoleum - Scraping Up Linoleum - Restoring Wood Floors - Ripping Up Linoleum - Removing Black Tar from Wood FloorsGloves and a face mask and knee pads are a must. A mixture of hammers, screwdrivers, crowbars, floors scrapers and good ole brute force were able to remove the plywood, felt and any remaining nails. So many nails!


Removing Linoleum - Scraping Up Linoleum - Restoring Wood Floors - Ripping Up Linoleum - Removing Black Tar from Wood Floors


Removing Linoleum - Scraping Up Linoleum - Restoring Wood Floors - Ripping Up Linoleum - Removing Black Tar from Wood Floors
By the end of Saturday I had removed all the plywood and nails. I covered the floors with drop cloths again for the evening. So far it was 10 hours of total work to get this far. Not Pictured - me laying on the floor (multiple times) waiting for my back to let me get up and start working again. This is very back breaking work!


Step 3 - Removing the Tar Paper

Sunday was a new day. I woke up real early and start boiling water in our biggest pot and the tea kettle at the same time. I would repeat this at least 10 times this day.

Hot Water Method of Removing Tar Paper
  • Boil water in the tea kettle/pot
  • Pour scolding hot water in a 5 gallon pail
  • Dip 4 old beach towels into pail
  • Pick up a towel (with thick rubber gloves - they are hot!)
  • Let excess water drip back into pail
  • Lay towels over the floors in a single layer
  • Wait 15 minutes
  • Pick up the towels
  • Scape the floor boards with a 2 inch paint scraper
  • Repeat above steps 2 more times until most of the tar is gone.

Removing Linoleum - Scraping Up Linoleum - Restoring Wood Floors - Ripping Up Linoleum - Removing Black Tar from Wood Floors
Using this method is tedious, you are on your hands and knees for hours, back breaking, wet, dirty, sloppy, gooey work. Sounds fun right?!

 Left - A pail full of muck!


Removing Linoleum - Scraping Up Linoleum - Restoring Wood Floors - Ripping Up Linoleum - Removing Black Tar from Wood Floors


Removing Linoleum - Scraping Up Linoleum - Restoring Wood Floors - Ripping Up Linoleum - Removing Black Tar from Wood Floors


Above - some of the tools of the trade

Left - hot wet towels doing their thing


Removing Linoleum - Scraping Up Linoleum - Restoring Wood Floors - Ripping Up Linoleum - Removing Black Tar from Wood Floors
Slowly but surely I am making progress


Of course no project would be complete if I didn't get some (or a lot) of help from My Little Helper, Lily.

Removing Linoleum - Scraping Up Linoleum - Restoring Wood Floors - Ripping Up Linoleum - Removing Black Tar from Wood Floors
 Lily spraying hot water into the pantry.

By early afternoon on Sunday I had worked 18 hours in less than 48 hours. I had to stop without doing beneath the stove and the refrigerator to bring the kids to MiSci to see the holiday trains - after-all giving a satisfactory answer to "what are we doing that is fun today?" always trumps finishing a project. I worked on those remaining areas on Wednesday for another 4 hours. In total - 22 hours of being on my hands and knees ripping, scraping, sweating and aching, but it was worth it...

Here is the Semi-Finished Product...

Removing Linoleum - Scraping Up Linoleum - Restoring Wood Floors - Ripping Up Linoleum - Removing Black Tar from Wood Floors

....sanding and staining and refinishing will have to wait until after Christmas...because now it is all about making the house pretty, being merry with family and friends and enjoying time with Karen and my three little crazies.


"Cotton Headed Ninny Muggins" - Buddy the Elf


From crazy and silly to picture perfect sweeties in a blink of the eye!

Merry Christmas, Happy Holidays & Happy New Year!

Tuesday, November 11, 2014

Making Wooden Pedestals for a Wedding

Sorry for the little delay in Restoring The Splendor posts. It is not that I have not doing anything...that is NEVER the case!

The reasons for the lack of posts are two-fold:
  1. I really did not want to bore you posting about the fall clean-ups I have done each of the last 4 weekends. I mean I could probably go on and on about what it is like to rake pine needles and leaves in a miniature-forest - and how if you miss a week you will lose a kid in the underbrush...but I won't. 
    • However one thing I will say is that having both my backpack blowers fail (yes two) has been more than a little bit of a pain in the arse (sorry...I had to use that reference...I have been getting caught up on Game of Thones...yes I am late to the party!). I actually had to use a rake (ack!)
      • Thankfully my neighbor, Chris, of Full Throttle Repair Shop, got my really old backpack running again. He and Brooke have a mobile repair shop. He fixes small engines, mowers, snow-blowers, boats, ATVs, and snowmobiles...just give them a call and he comes to you! Pretty cool!
  2. The second reason for the lack of recent posts is this is prime wedding season! Karen and Splendid Stems Floral Designs has been very, very busy lately! We really are lucky. Karen does something she loves...and in that process she gets to make everything pretty on a couple's first most important day!
    • With that said, I am always happy to be her delivery guy...and the guy that makes things happen. She comes up with the designs and has the vision. I make sure she can pull it off. Building wedding arches, hanging a 15 foot flower garland off a chuppah or making sure 50 hanging votives or floating vases are all hung at just the right height - I can do that!
That brings me to this post. Karen needed beautiful wooden pedestals. She found just the right ones from one of her suppliers. However they were unavailable. She sent me an email with the subject..."Can you make these?" I wrote back "Challenge Accepted"...channeling my inner-Barney Stinson.

How to make Wooden Pedestals
Sure these were made for a wedding (and are now part of her rental inventory), but they can also be used in a home, individually or in pairs, to display something...maybe a flower arrangement?!...Call me. I know someone :-)

Step 1 - Google It
Google is your friend. Find the ones you like. Get the demensions. Print out a picture for reference.

Step 2 - Buy the materials
Karen needed 39 inch high by 13 inch wide pedestals. Each pedestal has 4 sides and a top. By overlapping the wide side of one 12x1 with the edge of another 12x1 the overall width would be close enough. I calculated I needed 27 feet of 12x1's so I purchased four 8 foot sections. I purchased a 1 inch thick butcher block for the top.

Step 3 - Cut to Length
Used my sliding miter saw to cut all the sides to 39".


Step 4 - Build your Box
Using Elmer's Wood Glue and my finish nailer I fastened each of the sides together - overlapping the edges. I used my carpenter's square to make sure it was...well...square.

Step 5 - Measure and Attach the Top
I measured the dimensions of the end of the box and cut the butcher block to size. Then I attached it with wood glue and finish nails.


Step 6 - Oh so Smooth
Sand every side and the top. I used my orbital sander - being careful NOT to round over the edges. I started with 120 grit and worked my way to 220 grit.


Step 7 - Pre-Stain
These pedestals were to be stained. The first step is to remove all the sanding dust with a tack cloth. Then use a Pre-Stain. Do NOT ruin your hard work by skipping the pre-stain!!! It is so important - especially for soft woods. Without pre-stain you are taking a huge risk that your finished stained project will look uneven and blotchy. It really takes less than 5 minutes (for a project this size) and costs $7 (and you will have plenty left over for your next 10 projects)...so there is no reason to skip this step!


Step 8 - Stain
Pick your stain - test it on a scrap piece first! Follow the instructions....which includes wiping off the excess stain.
  • Hint: 
    • Penetrating Stains (regular stains) - get wiped off after they are allowed to soak in for a period of time. 
    • All in One Stains (stain and polyurethane in one) - get applied and left alone to dry.


Step 9 - Optional - Polyurethane
At this point you need to decide if you want a polyurethane finish on your pedestal or not. We chose not too, because Karen wanted them natural to match the wedding's setting.

The Finished Product


It is really cool to know that something I made was an integral part of someones wedding ceremony and will be seen in their wedding pictures for years to come. Now I know how Karen feels after every wedding! Lucky!

Thursday, October 16, 2014

Winter Prep - Muddy, mucky, walkway no more

When you are looking to buy a house, there are some things that neither you, nor your home inspector, will notice. Some of these things will leave you scratching your head thinking, "This house has been here 75 years...so why now, in our first winter, is this a problem?"

One such issue we noticed last winter related to the front walkways...our beautiful naturally set (read as: set in dirt) stone walkways. All winter long - the snow melt turned the dirt into mud between the stones. This mud remained wet, soft, sticky and mucky throughout the winter. So much so that when you walked on the stones you could feel them shift/tilt under foot. Then god forbid you missed the stone and your boot sunk into the mud...no amount of hopping in the snow was going to get all that mud out and keep the kids tracking it into the house.

Sure there were those lucky mornings when the mud had a stiff upper layer from the previous night's freeze, but any trips outside during the day included Karen and myself pleading with the kids "skip from stone to stone!" or "don't step in the MUD!"...and no matter how nicely we begged, those requests were usually followed by the sound of one (or more) of the kids saying "oops."

How to correct a muddy walkwayHow to correct a muddy walkway-how to fix a muddy walkway - how to add drainage to a walkway

Original Front Walkway                                    Original Side Walkway

Making an already laid Walkway Mud-Proof without taking it apart and reinstalling

This walkway was really nice! I really wanted no part of numbering every stone with chalk, taking pictures of the pattern, then lifting all the stones and then reinstalling it. So I came up with a great idea that I will dig out the dirt in-between every stone then fill the space with pea gravel. I mean how hard could that be?!

The first thing I tried was a small hand shovel. However it turned out that was too big. So what turned out to be the perfect tool? A flat-head screwdriver! Yup. I removed the dirt "grout" from in-between every stone with a screwdriver!

Step 1 - Loosen the Dirt in-between Each Stone

How to correct a muddy walkway-how to fix a muddy walkway - how to add drainage to a walkwayI had a foam kneeling pad and spent hours (like 12 hours!) digging out the dirt between each stone with my handy dandy flat-head screwdriver. If you look carefully in the picture to the right you can see my screwdriver sticking straight up in the dirt in front of the white garbage can (There is a better picture below).

My Tool of Choice


Step 2 - Remove the Dirt from the Walkway

How to correct a muddy walkway-how to fix a muddy walkway - how to add drainage to a walkwayAfter the screwdriver loosened the dirt, using a pair of mechanics gloves to protect my fingers, I scooped up a majority of the dirt and threw it inside an old kitchen garbage can. I then dumped the dirt along my property.

Step 3 - Get the Rest of the Loose Dirt Out

I used my backpack blower to blow out any remaining loose dirt between the cracks. Sorry no pictures of me actually using the backpack blower, but here are a bunch of after pictures:

How to correct a muddy walkway-how to fix a muddy walkway - how to add drainage to a walkway


How to correct a muddy walkway-how to fix a muddy walkway - how to add drainage to a walkwayHow to correct a muddy walkway-how to fix a muddy walkway - how to add drainage to a walkway

How to correct a muddy walkway-how to fix a muddy walkway - how to add drainage to a walkway
The Intersection Between the front Walkway and the Side Walkway


Step 4 - Work on the Stepping Stone Side Walkway

The side walkway was more of a stepping stone style, rather than the interlocking style of the front walkway. Therefore I picked up the stones and placed them to the side. Then using a flat edged shovel I cut an edge on the sides of the walkway and dug down a couple inches along the whole path.


Before                                                        After
Side Walkway


Step 6 - Fill in the Cracks with Pea Gravel

I chose pea gravel because it was small enough to fit in the cracks of the front walkway, but would still allow rain or thawed snow to drain to the bottom, rather than sit on top.

I picked up 3/4 yard at Georges Market in Latham.


This part of the work was actually fun, fast and easy. All I had to do was dump some pea gravel from my wheelbarrow onto the path and then I used a large push broom to sweep the pea gravel into the cracks.

How to correct a muddy walkway-how to fix a muddy walkway - how to add drainage to a walkway

How to correct a muddy walkway-how to fix a muddy walkway - how to add drainage to a walkwayHow to correct a muddy walkway-how to fix a muddy walkway - how to add drainage to a walkway


How to correct a muddy walkway-how to fix a muddy walkway - how to add drainage to a walkway


I used the same process for the side walkway.


Of course no project would be complete without a visit from my biggest fans and little helpers.


How to correct a muddy walkway-how to fix a muddy walkway - how to add drainage to a walkway

So far, so good. The walkway is working out well. It rained very heavily last night and there are no mud puddles sitting on top of the walkways as they would have before this project. The pea gravel allowing the water to drain and is working out well. It is not perfect, because it tends to get loose every once in a while (especially when the kids pick it up to let it fall through their fingers....but who can blame them...it feels nice!), but nothing that doesn't clean up nicely.

Overall this project can be considered an great success, unless you of course are my screwdriver...